Zoom Accessible Features Overview
Accessibility Best Practices for Zoom Meetings
During screen sharing
Describe any slide graphics that convey information during your presentation and say your name before you speak. Also encourage all presenters to do the same.
Say out loud of your action "I am going to share my screen", count 1, 2, 3 before you click share.
Same thing, "I am going to stop my screen share", count 1, 2, 3 before you stop.
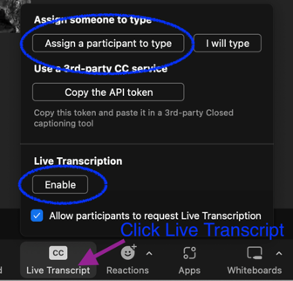
Enable the Live Transcript and the Closed Captions Feature
Enable the Live transcription during the meeting to make it more inclusive. For closed captioning, you need to first enable closed captioning and assign someone to type.
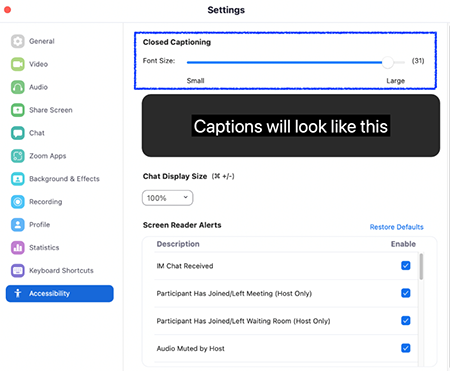
To adjust font size of chat or closed captions, go to the settings section on the Zoom desktop app. Click on your profile picture, and then Settings > Accessibility.
“Spotlight” ASL Interpreters
If using an ASL interpreter and recording a session, please make sure the meeting host “Spotlights” the ASL provider’s video so that the ASL is captured in the recording.
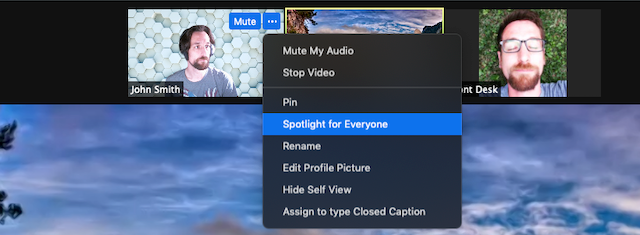
Pin screen allows you to disable active speaker view and only view a specific speaker. Pinning another user's video will only affect your local view in the Zoom session, not the view of other participants and will not affect cloud recordings.
Spotlight video puts a user as the primary active speaker for all participants in the meeting and cloud recordings. To spotlight, you need at least 3 participants in the meeting with their video on and can only be done by the host.
When using Breakout room
Ensure the interpreter is added to the same breakout room as the person using the interpreter.
Enable “Always Show Meeting Controls”
When screen sharing, the Zoom control bar will be hidden at the top of the screen. Once you scroll to the top of the screen, the control bar will appear. To keep the control bar continuously showing, select the "Always Show Meeting Controls" checkbox. By changing the setting, you don’t have to worry about the control bar appearing and disappearing upon hovering (especially if you are new to Zoom and don’t know how to make the bar at the bottom show up after it has disappeared).
From within the Zoom Client:
- Select the “Home” tab.
- Select the Settings “Gear” icon. A settings pop-up window will open.
- Select the “View Advanced Features” (Windows) or “View More Settings” link (Mac) under General settings. The Zoom website will open. Login if you are prompted with the login screen. The Meeting Settings page will open.
- Navigate to the In Meeting (Basics) section of the Meeting Settings page.
- Enable the “Always show meeting control toolbar” setting.
Communicate Keyboard Shortcuts
Send out the Zoom Keyboard Shortcuts ahead of time. These instructions are valuable for anyone using keyboard only navigation or assistive technology. It could be helpful to anyone who may have had their mouse stop working unexpectedly.
To adjust font size of chat or closed captions, go to the settings section on the Zoom desktop app. Click on your profile picture, and then Settings.
